
Quick Physics - The physics movements
3. Using the built-in physics movements
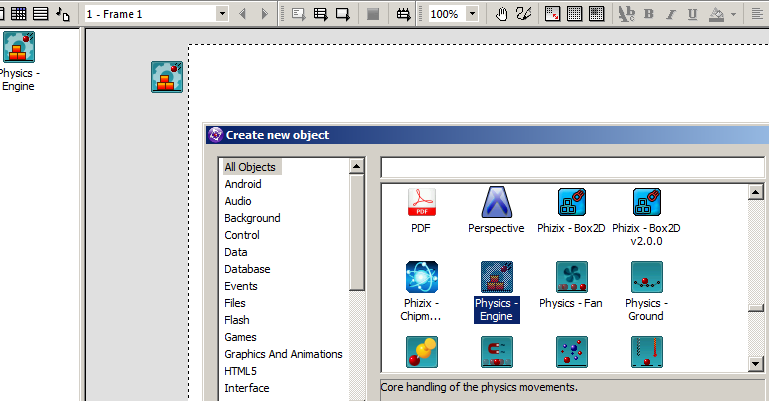
As explained previously, you will need to drop in the Physics Engine object somewhere in or outside of your frame. Let's do this by inserting a new object into the playarea. Go to Insert > New Object, select the Physics Object and put it just outside of your playarea.
Once you have done that, let's insert an active object. Let's insert a new active object and let's create a box (32x32). Right-click on an empty zone of the frame, choose the Insert object option. Choose the Active object in the list of object, and drop it somewhere in the frame. Double click on it to open the picture editor. Locate the Size icon (the diagonal bar), and set its size to 32 x 32. The object should appear like this :
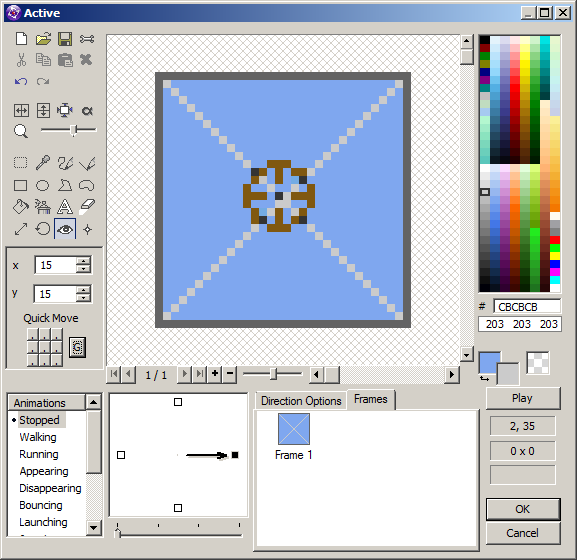
Once you have done this, don't forget to click on the Hotspot Icon (eye) and click on 'G'. This will automatically centre the hotspot at the centre of mass. Not necessarily the centre of the image, the centre of the mass of the object. Clickteam Fusion 2.5 neatly does this automatically for you by just clicking 'G' inside the picture editor.
We also need to give a name to this object : right-click on it, and choose Rename. Enter 'Box' as a new name.
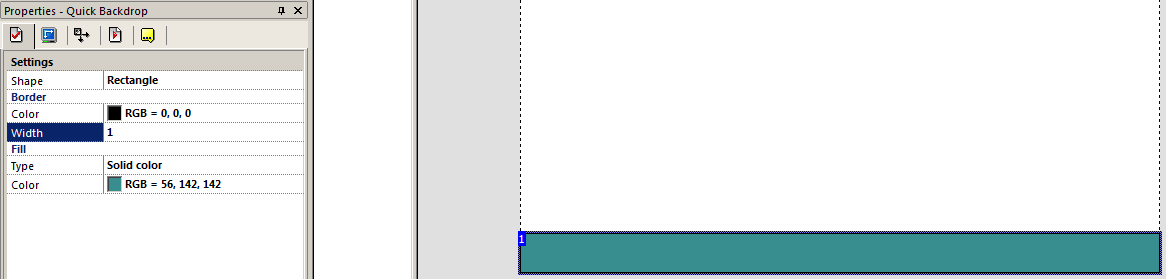
Now we need to create some kind of 'ground' for our box to land on. So let's insert another object. This time a Quick Backdrop object. Stretch it so that it fits our playrea and maybe put a border on it.
Once you are happy with your bit of 'ground', right click on the object and select Create > Active Object. This will create an active object looking exactly like the Quick Backdrop object.

Once done, you can delete the quick backdrop and position your new ground active object at the bottom of the frame. Don't forget to edit the Ground Active Object and set it's hotspot position to 'G'. We also need to define the name of this object. Do as before, right-click on the object and choose Rename. Enter 'Ground' as a new name.
Now we need to setup some properties for our box and ground so let's do that next.
So, we have our 'ground' in position and we have our 'box' ready to go. Let's setup the properties of these two objects so we can tell our physics engine which is the box and which is the ground and how they should behave in the physics world.
Let's do the floor first. Click on the floor active object and go to the properties box. Click on the Movement tab and in the movement type select: Physics – Background.

This will present you with some additional properties you can configure. First, locate the property called Obstacle. Open its combo box, and select 'Obstacle' : the object will now generate background collisions. Also change Collision Shape to 'Box'.
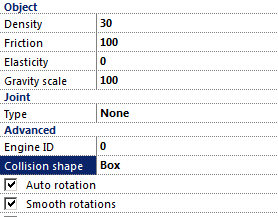
Let's move onto our box. Click on the box we created and go to the movement tab of the properties, select the Physics – Static movement type.
In the properties of the movement, locate the line name Initial direction. Click on it, and select each one of the available 32 directions (you can click on the bottom-right button). This will make Clickteam Fusion 2.5 choose a random direction when the object is created. Now change Collision Shape to 'Box' and select 'Smooth Rotations'.
So that is pretty much our 'physics world' setup and we haven't even wrote a single event, expression or line of code yet. That's how easy things are in Clickteam Fusion 2.5. Now if you Hit F8 to run the game, you will see everything automatically starts working like it would in a physics world, the box moves downwards towards gravity but it drops straight passed the 'ground' active object we created.
Let's hop over to the next page and start working some magic!
Spread the word!
You can share this document using the following buttons.