Adding lives
Adding lives in your game
Ok, now it starts to look like a game. But we want to add some more actions to make it fun! The first thing we have to do, is to alter the first event we made. We don't want the ball to bounce while hitting the left and right edges. So doubleclick that condition and deselect left and right. Now, if you run the game, the ball will dissappear out of the screen if one the paddles doesn't catch it. We don't want that to happen. We want to center the ball in the screen instead.
So make a new conditon like the one shown below:
 (Small ball 3) leaves the play area on the left or right
You remember how to do that right? If not, just read that part of the tutorial again. Now, we'll add an action to center the ball. Under the ball icon, select Position / Select Position.
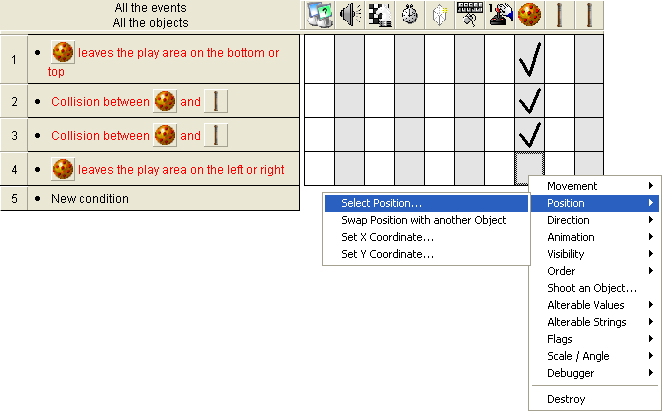
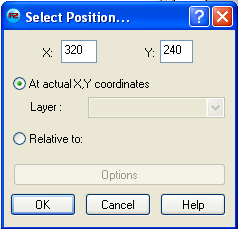
The default position should be the center. Check that it says X: 320 and Y: 240 like in the picture.
Click OK. Now try the game again. You see that the ball centers itself when one of the players doesn't catch it.
Good! We are almost there now. We only need to add a few more things. We don't want the game do run forever, so we will have to limit the number of times the player can miss the ball. Add a new condition similar to the last one you created. But this time we only want to test for the ball to leave at the left. As the action, select Number of Lives / Subtract from number of lives under the Player 1 icon, and select 1.
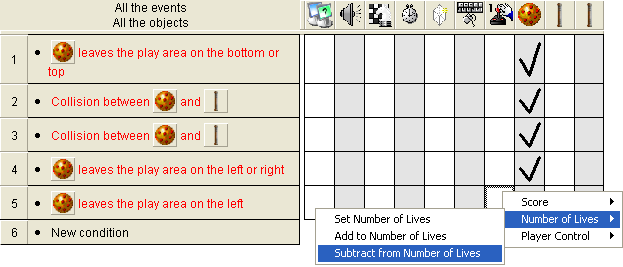
Now do the same thing for the other player. But this time test if the object leaves at the right.
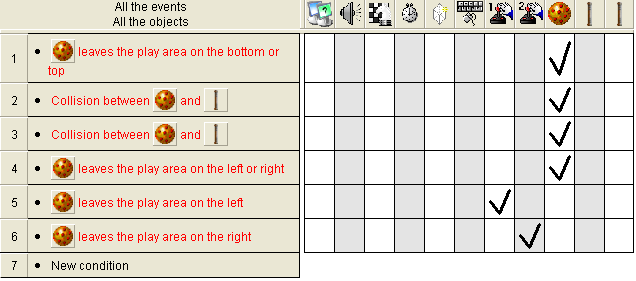
You also have to make an event that tells the game to end when one of the player's lives is 0. So make a new condition that tests for Player 1's lives, like this:
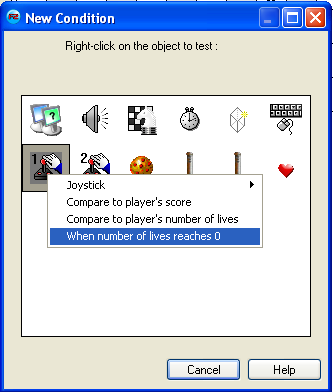
As the action, select End the Application from the Storyboard Controls icon. Do the same for player 2.
The events should now look like this:
- Number of lives of
 (Player 1) = 0
![]() : End the application
: End the application
- Number of lives of
 (Player 2) = 0
![]() : End the application
: End the application
To display the lives in the game, we will have to enter the Frame Editor again.
Rightclick somewhere in the Frame Editor and select Insert Object.
Scroll down and select the Lives Object. Doubleclick on it to create it. Place it above Player 1.
Clone the Lives object. Place it above Player 2 and in it's properties select the Settings tab and change it to Player 2.
You see that you can choose how the lives shall appear in the game. Run the game. You should now have a fully functionally 2 player game!
Well, something's still missing? Yes.. Of course we want a background and some sound effects! For the background, just browse through the gfx library again. You'll find some goodlooking backgrounds in Games / Backgrounds / Space – Backdrops. Then just drag the backdrop you want into the playarea. Adding sounds is very easy. Go back to the Event Editor again. Now, just add sound actions in the conditions you want to play sounds. For instance this event:
- Collision between
 (Small ball 3) and
  (Bat 1)
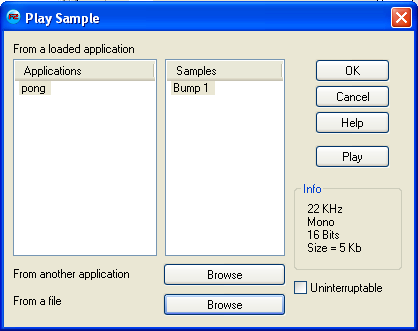
Like this:

You'll be presented with this screen. Click on the From a file Browse button.You will find lots of samples to use in the Samples folder in the TGF2 directory.
Congratulations!
You have made your first game! I hope you found this tutorial easy to use. Happy Clicking!
Spread the word!
You can share this document using the following buttons.
