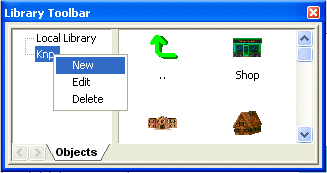
Frame Editor - Library Toolbar
Frame Editor - Library Toolbar

Upon installing your version of Clickteam Fusion 2.5, the install program has automatically pre-defined the default libraries. To open a library, simply click on its folder name in the left panel. Then click on the name of the library in the right panel and your objects will appear in the window.
To have a glance at the object in real size, simply double click on its icon. Just click somewhere on the screen to close this little window.
To add a library
Have the library ready on your disc in a specific folder. Then right click on the library folder panel to open the popup menu and choose the New option. A directory selector will appear for you to enter the directory where your libraries are stored. Then you will have to enter a name for the new library... and your library will be ready for use. Libraries are simply Clickteam Fusion 2.5 applications saved in a library folder. Note: applications or library files created with older versions of the program are supported too, but .MFA files are displayed faster and use less memory when displayed as library.
To delete a library
Select the library in the library folder, and right click on it. Then choose Delete.
To rename a library
Select the library in the library folder, and right click on it. Then choose Rename and enter the new name.
To add a library object to a frame
Select the library in the library folder and drag and drop the object from the Library window to the frame editor.
Note: if a library contains only one frame, only the objects of this frame will be displayed in the Library window. If the library contains several frames, the list of frames will be displayed as well. You can drag & drop frames from the library window to the Workspace toolbar, i.e. you can make your own Frame libraries to create frame templates for your applications.
Spread the word!
You can share this document using the following buttons.
