
7: OUR FIRST FEW 3D OBJECTS
7: OUR FIRST FEW 3D OBJECTS
|
OK, let's drop our first objects. Every object in Firefly is classed as a Node and you can have many different types of node, however the main ones will be Primitive Nodes and Static Mesh Nodes, the first thing our breakout game needs is a floor, a floor is just a flat surface so we can use a Primitive Node for that as we dont need to model something special. just like we did with the other firefly objects add a Primitive Node to your world. As we will have a few primitive nodes it might get confusing so we will rename this node Floor you could of course call it anything you wish, right mouse the node and choose Rename |
||
 |
||
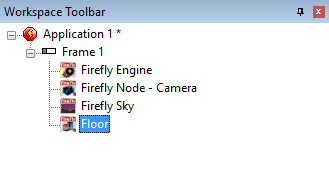
| If you change the Primitive Type in the properties from Cube to Plane you can see that the default tile values are all set at 10. | ||
 |
||
| this will create a plane that has grids that are 10 units wide by 10 units tall and have 10 of them across and 10 of them down. which looks something like this. | ||
 |
||
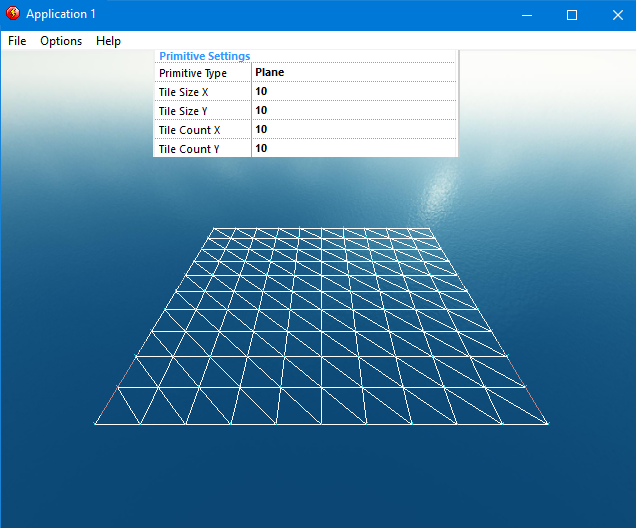
| Everything you see inside a 3D computer world is made up of Triangles, the more triangles you have on screen at any one time the longer your computer will take making that image, so where possible you need to use as little triangles as possible. Our floor at the moment is using 200 triangles when in fact we only really need 2 triangles. | ||
 |
||
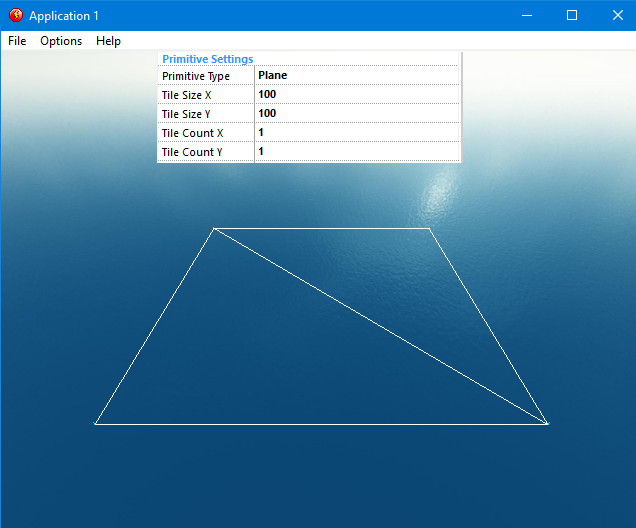
| Making the floor out of just 2 triangles will speed up the Rendering of our screen and inturn make the FPS of our game better, however that floor looks a little too small, it is currently 100x100 and 1x1, we need a floor that is 400 units wide, Now that we know what settings are best for our game change them in your game by setting the tile settings to 400x400 and 1x1. Run the Frame to see your floor in the world. |
||
 |
||
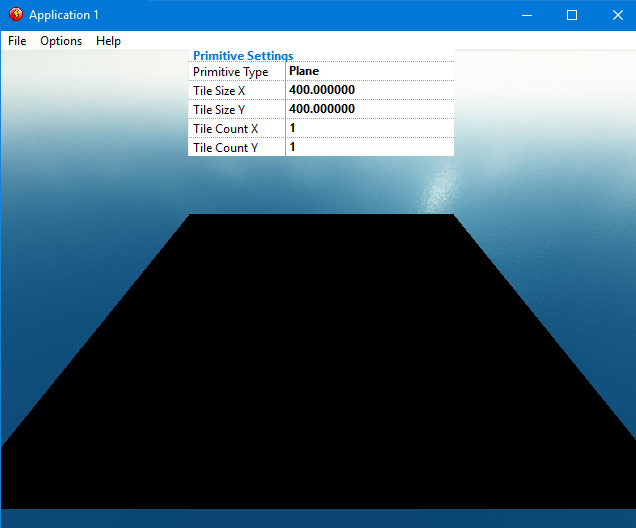
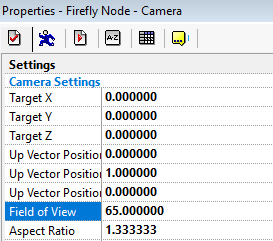
| Oh dear, the floor is black, but dont worry we'll get to that in a minute, firstly lets explain about the camera setting Field of View (FOV for short) setting, how much of the scene the camera can see at once. A wide-angle lens gives a wider field of view, but you have to be closer to things to be able to see them, and there is also greater perspective distortion. At the other extreme, a telephotolens gives a very narrow field of view, but can take pictures of things from much further away. while its not exactly a zoom it can be used like one, but be careful as rotating cameras with a FOV with high or low FOV values can cause motion sickness. | ||
 |
||
| Currently the cameras FOV is set at 72 I think that distorts the floor a little too much so drop it down to 65. | ||
 |
||
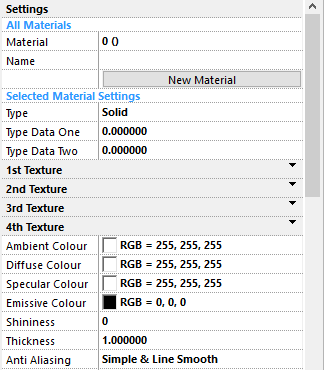
| Now then why is the floor black ? is because we havent told the engine what to make our floor look like. In 3D everything you see is given a material and/or a texture. which tells the engine what colour everything should be and what properties such as reflectivity and opacity to make things. In Firefly we use a Material Cache add a new object from the menu and select Material Cache. | ||
 |
||
| There are loads of different settings for Materials as there are so many different effects that Firefly is capable of doing, however as this is your first Firefly tutorial we will stick to the very easy stuff and you can mess with all the other settings at a later date. | ||
 |
||
| Think of the Material Cache as store cupboard where you keep different things, starting at 0 and going as high as you need it too, each space in the cache holds 1 material and upto 4 textures. | ||
 |
||
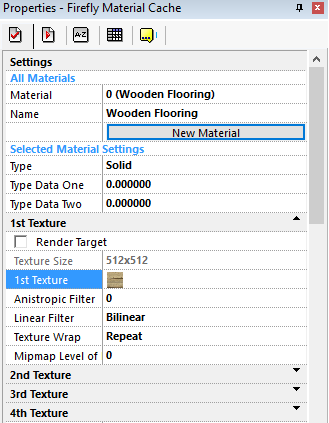
| Give your first material a name i suggest Wooden Flooring and then hit the new material button and it will create a material called 0 (Wooden Flooring) | ||
 |
||
|
Click into the line that says 1st Texture and there will be another line that says 1st Texture click into that one and you will see the blue box just like we did for the skybox textures.Find the Models directory and then the Textures Directory, choose Wooden Floor and press OK We have the Floor in game and we have the Material ready in the Material Cache in the next step we'll put the material on the floor. |
||
Spread the word!
You can share this document using the following buttons.