
13. LETS GET STARTED
13. LETS GET STARTED
|
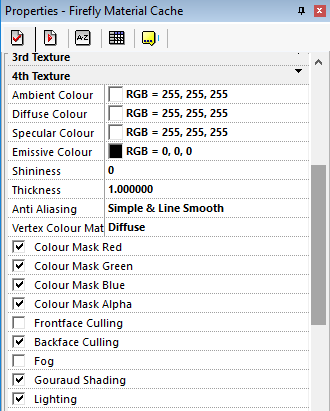
Now that we have real light our fake light objects look a bit dull, so lets now set their light settings. click on the Material Cache and change each of the poles (red, green, pink) lighting setting back to on. |
||||||||||
 |
||||||||||
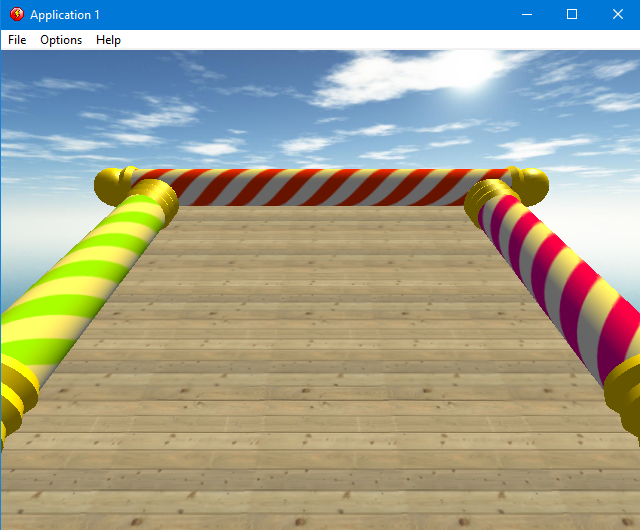
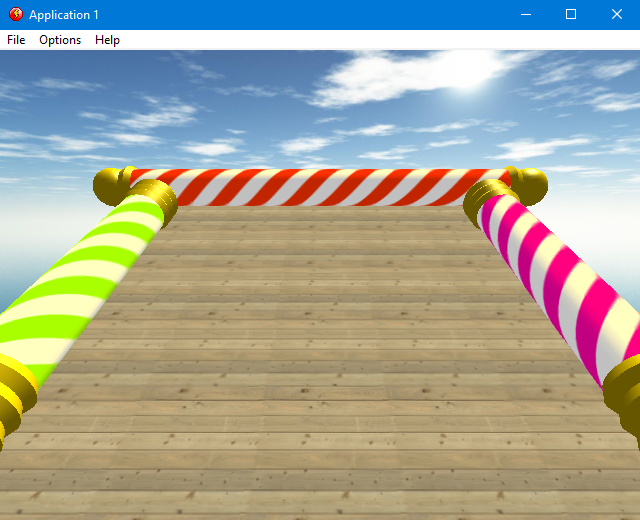
| So now were using the world light, lets look at how it looks in game | ||||||||||
 |
||||||||||
| Hmm very golden and very dull, thats not right at all, but its better than black so it's a start. Lets quickly run through what the 4 colour settings are, i know we changed a few of them for the sun and the pole ends, but we didnt really understand what we were changing. | ||||||||||
|
||||||||||
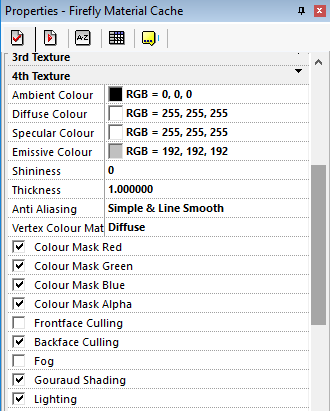
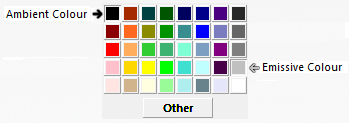
| For our poles i think we need the Ambient (Shadows) to be 0,0,0 black and the Emmisive colour to be 192,192,192 which will put a nice light inside the tube but not too bright as to take away the shading, set that for all 3 poles. | ||||||||||
  |
||||||||||
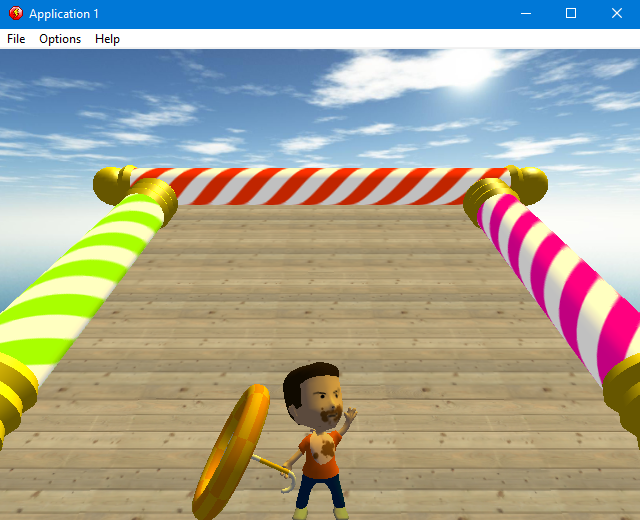
| Let run it now and see how it looks ? | ||||||||||
 |
||||||||||
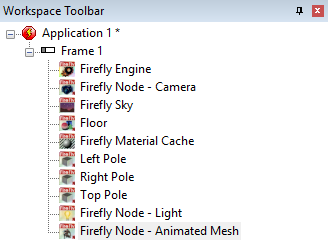
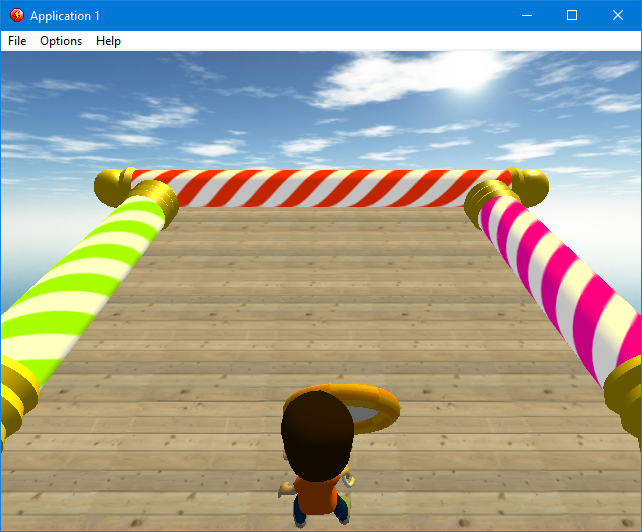
| Perfect, now then we need a player to hit the ball, lucky we have a funky little animated man, so lets add an Firefly Node - Animated Mesh to our scene. | ||||||||||
 |
||||||||||
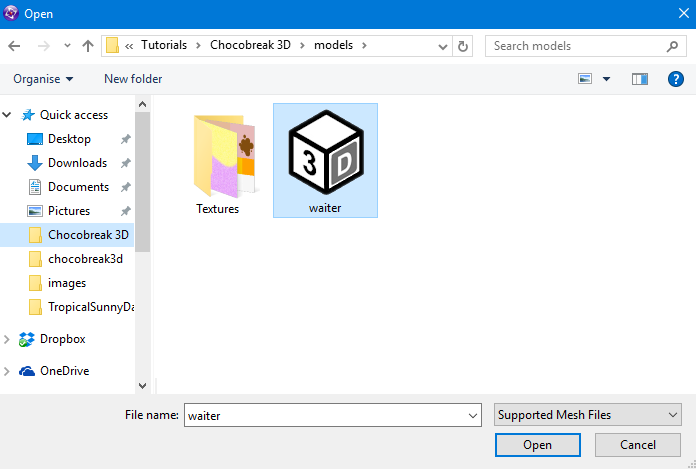
| Just like we did for the poles we need to load in a Mesh File, same as before click into the line and select the little box at the end and choose the Waiter model. | ||||||||||
 |
||||||||||
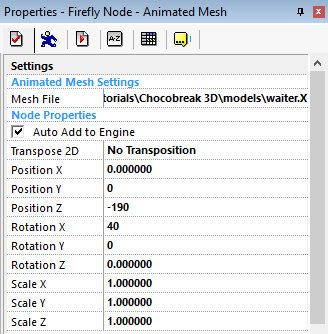
| Each model will be unique and will take some time figuring out the initial positioning and rotations to suit your game, its mostly trial and error, so for now use these values on the player mesh. Position Z -190, this setting will bring him back closer to the camera, Rotation X 40 this will tilt him slightly back so hes facing the camera at a better angle. | ||||||||||
 |
||||||||||
| If you have pressed play which i'm sure you have done you will see that he starts to go through all of his animations and then loops back to the start, that's because we havent told him what to do yet. | ||||||||||
 |
||||||||||
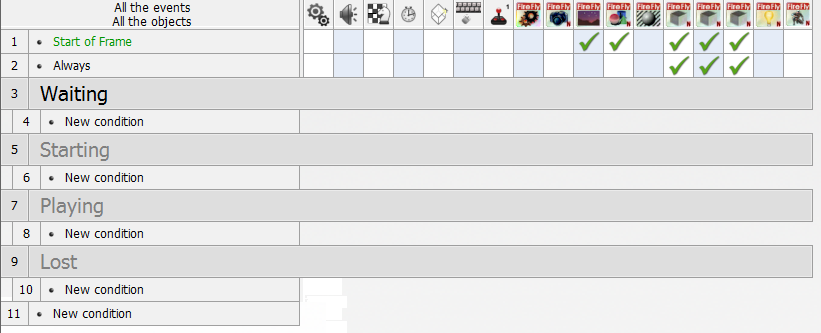
| Lets break our game into 4 sections, Waiting, Starting, Playing, Lost, using the insert menu insert 4 new groups make sure only the waiting one is ticked to be active at the start and untick the other 3. | ||||||||||
 |
||||||||||
| In the waiting section we want him to be waving at us, so create a new condition called Start of Frame, | ||||||||||
 |
||||||||||
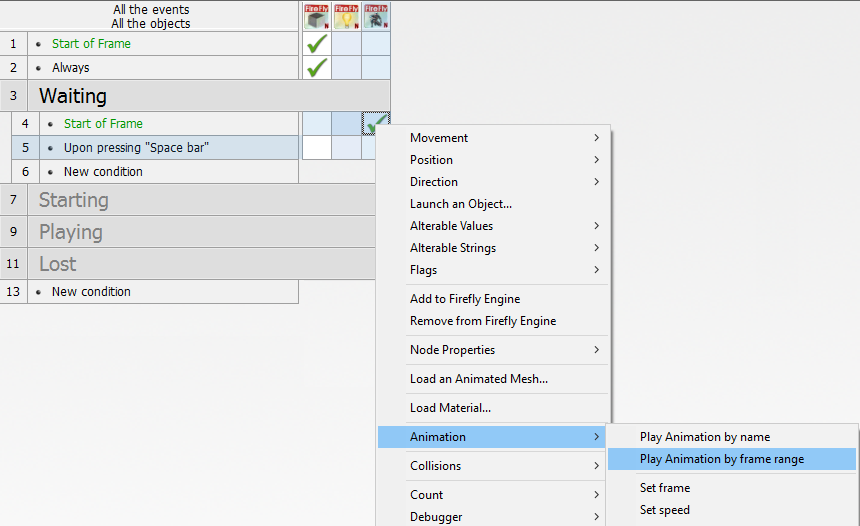
| Most models that you get from the internet will come with a keyframe list that denote what frames make up the animations of the model, but for now you will need to trust me, for now we will tell him just to stand there waving, goto the frame editor find the animated mesh in the list at the top then under the "Start of Frame" line add another action, by using the right mouse and choose Animation -> Play Animation by frame range | ||||||||||
 |
||||||||||
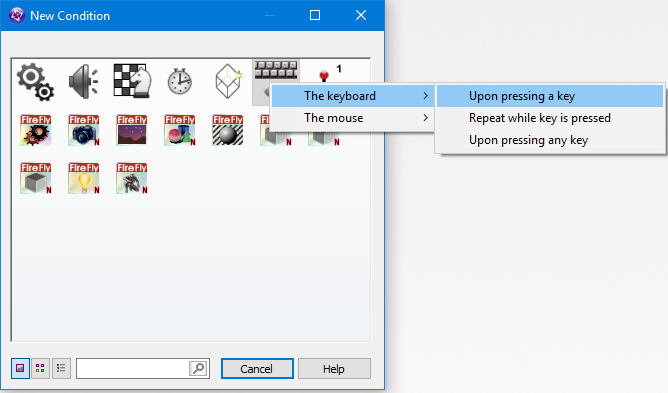
| Choose 9 for the start frame and 17 for the end frame, that will keep him busy, until we press the spacebar to show were ready to play, he will then rotate to face the game and put his "Carrying Tray" down on the floor to help him hit the ball. Still in the Waiting events section, create a new condition The Keyboard -> Upon pressing a key in the popup press the Space Bar. | ||||||||||
 |
||||||||||
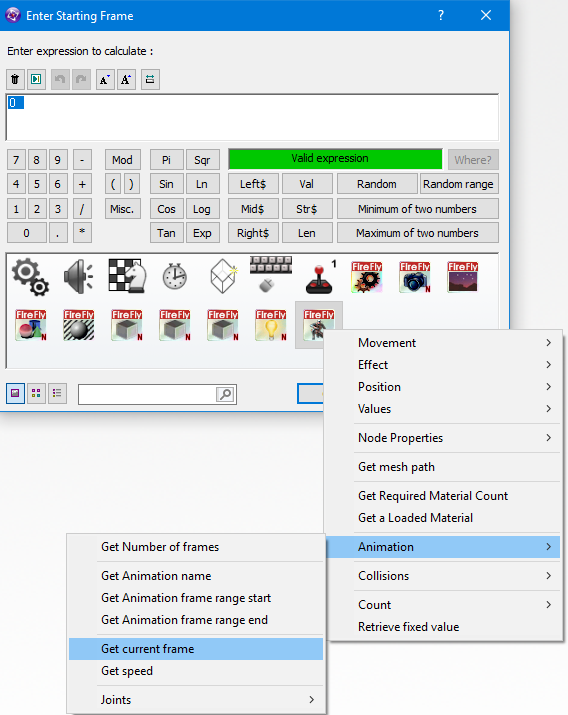
| Find the animated mesh in the list at the top then under the "Upon pressing Space Bar" line add another action, by using the right mouse and choose Animation -> Play Animation by frame range, in the popup window select the Animation -> Get current frame for the Starting frame and 36 for the end frame. | ||||||||||
 |
||||||||||
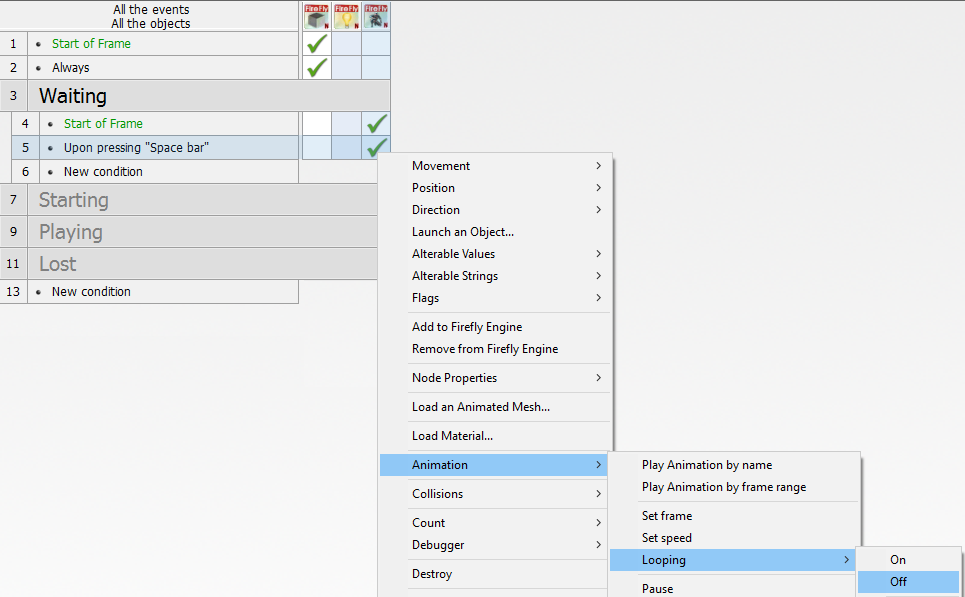
| That will make our lil waiter stop waving and put his tray down, once hes done that he will wave again and put his tray down again, because by default animations are set to LOOP, we need to turn it off so right mouse the grid again and choose Animation -> Looping -> Off, | ||||||||||
 |
||||||||||
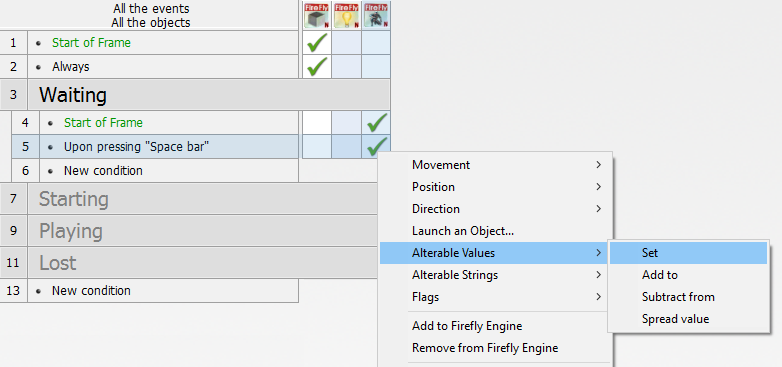
| That will take care of stopping him waving and lowering the tray to the floor, now we need to turn him around and stand him back up straight becuase we tilted him earlier, we are going to set his current angle to a alterable variable to keep track of it. in the same "Upon pressing Space Bar" line select Alterable Values -> Set. | ||||||||||
 |
||||||||||
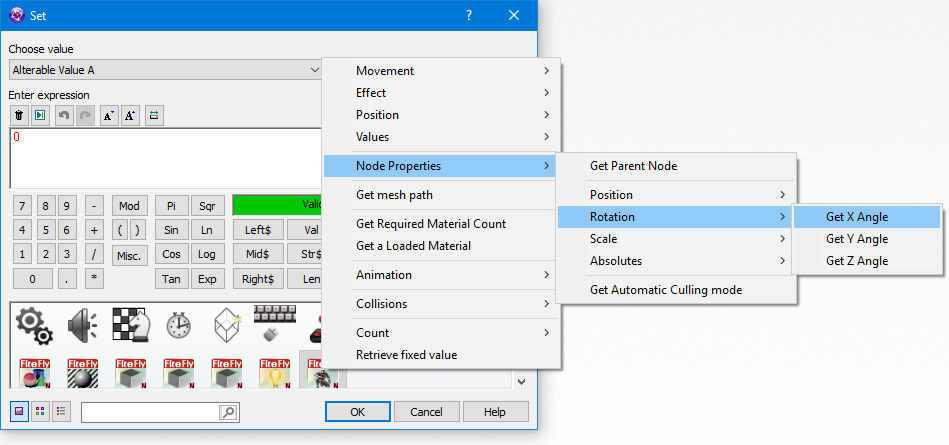
| In the popup window you need to select Node Properties -> Rotation -> Get X Angle, the menu system will convert your selection into XRotation( "Firefly Node - Animated Mesh" ) | ||||||||||
 |
||||||||||
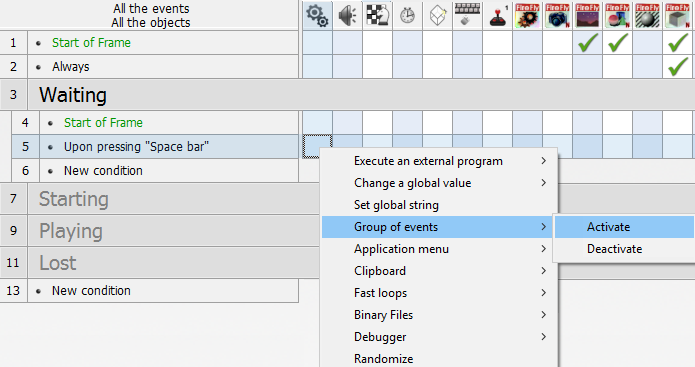
| Now we have everything setup we need to turn of the waiting events and switch to the Starting events, in the same "Upon pressing Space Bar" line and under "Special Conditions" select Group of events -> Activate | ||||||||||
 |
||||||||||
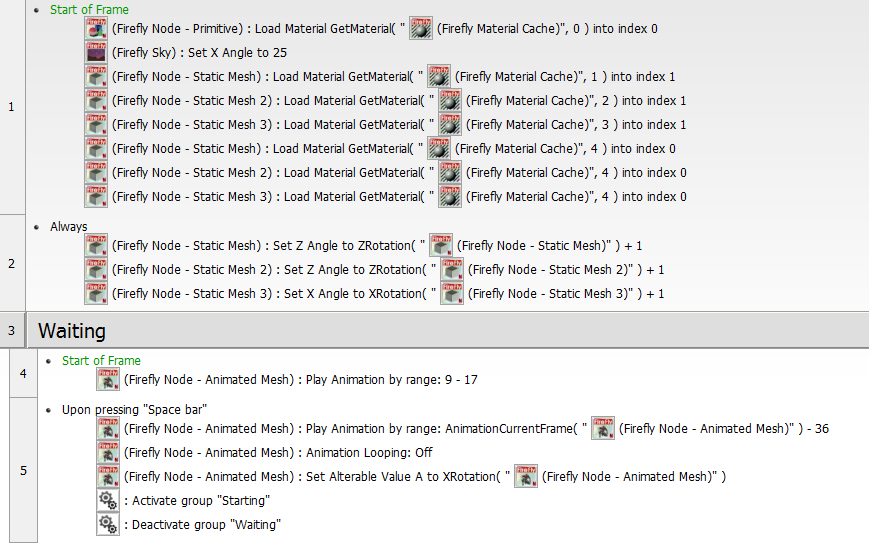
| In the little popup select Starting, then do the same again but this time choose Deactivate and then select Waiting. Once done your total events should match this. | ||||||||||
 |
||||||||||
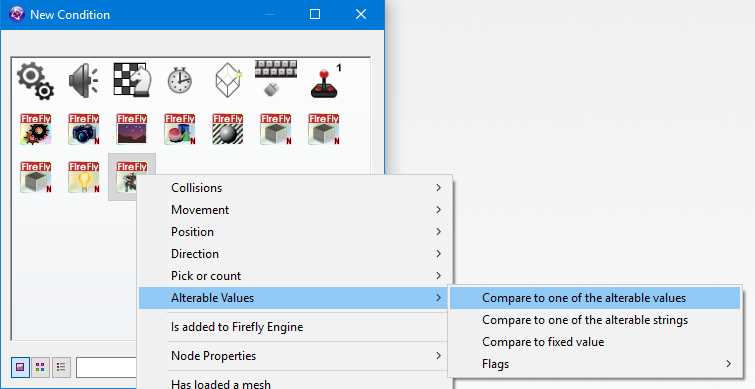
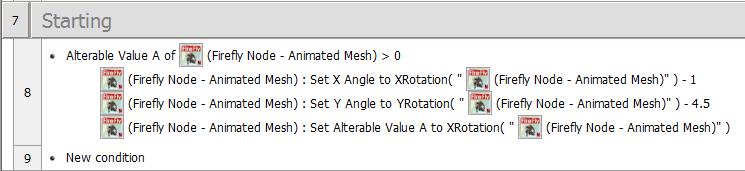
| In the Starting group we will be doing all the things that only happen once like putting the ball in the middle of the board and resetting bricks if they need resetting etc, but for now we just need to turn our waiter round, as we have the angle in the alterable value A , we need to check if its back at 0 if not rotate him some more, so create a new condition click on the animated mesh icon and select Alterable Values -> Compare to one of the alterable values in the popup set it to greater and make sure its set at 0. | ||||||||||
 |
||||||||||
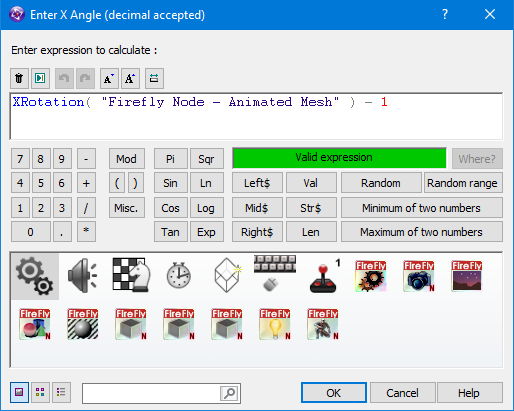
| this will now continue to do something until the alterable value is smaller or equal to 0, so what exactly do we need to do, first we need to change the tilt of the waiter back to upright, his tilt was based on his X angle. so lets set the X Angle to X Angle -1, just like we did with rotating the poles choose Node Properties -> Rotation -> Set X Angle. In the popup you want XRotation( "Firefly Node - Animated Mesh" ) - 1 | ||||||||||
 |
||||||||||
| While also standing him up straight we want him to turn and face the board so we need to also rotate his Y angle, so create another event but this time choose Node Properties -> Rotation -> Set Y Angle. In the popup you want YRotation( "Firefly Node - Animated Mesh" ) - 4.5 now his rotation is sorted out we need to ensure he stops when he reaches 0 so we need to set the alterable value A based on his X Rotation again. just like you did for the "Upon pressing Space Bar" line select add in a Alterable Values -> Set and once again In the popup window you need XRotation( "Firefly Node - Animated Mesh" ). | ||||||||||
 |
||||||||||
| Create a new condition and with the Animated mesh again choose Alterable Values -> Compare to one of the alterable values in the popup set it to lower or equal to and make sure its set at 0. this time you want to Activate Playing and Deactivate Starting, although there is more to go in here but we will come back to them later. Press Play now and watch how he turns after you press the space bar. |
||||||||||
 |
||||||||||
Spread the word!
You can share this document using the following buttons.